Build your own rocket for lift-off
Pages in this sectionThe science behind rocket launches
The Soyuz rocket that took Tim Peake to the International Space Station (ISS) in 2015 is a three-stage rocket. Its design is so successful and has such a great safety record that it had been used more than 1,700 times before Tim's mission.
Until very recently the Soyuz-FG was the only way to get astronauts to the ISS. But now private companies such as SpaceX are showing that they can develop alternative spacecraft for transport to the ISS.
Building a model rocket is the best way to explore how to achieve take-off. All rocket designs consist of two main parts: the rocket and the rocket launcher. Use different model rocket designs to see if you can achieve something as successful as the Soyuz.
How to build a pop rocket
For safety reasons, ask an adult to help or supervise as rocket-building can be explosive and messy. This model rocket is launched by the gas resulting from a chemical reaction. Ideally the launch should take place outside.
What you need
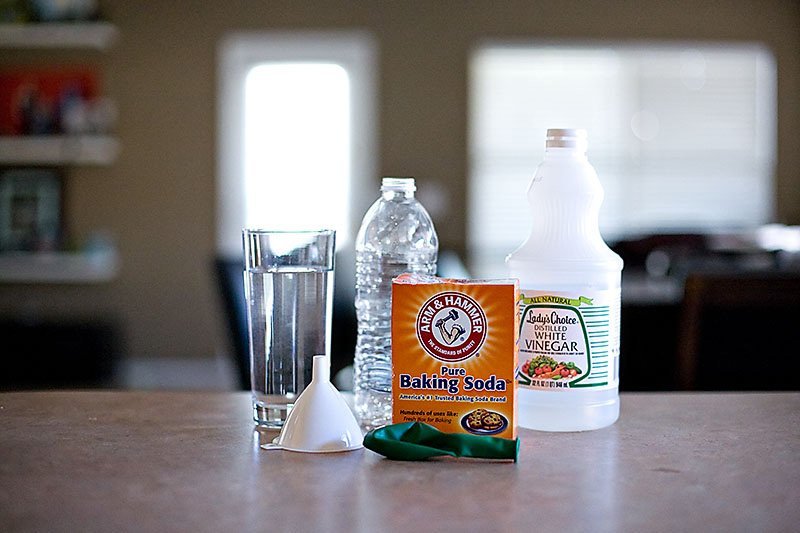
For the launch pad
- Tube or pipe
- Duct tape
- Wood block or bamboo cane
For the rocket
- Balloon
- Scissors
- Pen
- Sharp pin or similar
- Elastic band
- Plastic bottle
- Cling film
- Vinegar (preferably white as it’s less messy)
- Bicarbonate of soda (also known as baking soda - not baking powder)
How to make it
Recycle a cut-off PVC pipe or an old poster tube, or make a tube from an old cereal box and sticky tape. The tube should be twice as tall as the rocket and wide enough for the model rocket to fit loosely inside. Tape the tube firmly to a wood block with duct tape so it is stable. If you put the launcher at an acute angle of about 45 degrees (imagine a cannon), the model rocket with fly further. If using bamboo cane, tape the cane to the tube so that it extends beyond one end. Push the cane into the ground firmly to keep the launch tube steady.
Ensure the launcher is not directed at a window or anything fragile, such as plants or garden ornaments.
- First cut off the neck of the balloon. Draw a small spot roughly in the middle of the top of the balloon and then use the pin to pierce the balloon through this spot. Keep this close to the launch site together with the elastic band.
- Fill the bottle with vinegar until it’s about one-quarter to one-third full.
- Put 2-3 heaped teaspoons of baking soda onto a square of cling film and wrap it into a parcel small enough to fit in the neck of the bottle. (NB: Don’t wrap the cling film too tightly, as the soda eventually needs to escape to react with the vinegar.)
- Insert the soda parcel into the bottle and then close it using the pierced balloon and the elastic band. Make sure the hole is positioned over the opening of the bottle. Don’t worry if vinegar drips out. Now insert the rocket carefully into the launcher, balloon-end first. Never look directly down the launch tube.
- Stand back and wait for lift-off!
It may take a while for anything to happen. If nothing happens, approach the launch pad from the back. You make need to take the rocket out and give it a gentle shake to encourage the baking soda parcel to unravel.
Remember to have fun experimenting with the variables of your rocket design:
- Add a nose cone to the model rocket to make it more aerodynamic
- Add the Destination Space logo
- Add fins to the model rocket to stabilise its flight
- Use different sizes and weight of bottle for the rocket
- Vary the quantities of vinegar and baking soda